How to Choose an Emergency Exit Door for a School?

Time:2026-10-21 Author:Aria
0%

Choosing an emergency exit door for a school requires more than comparing prices, finishes, or hardware. The door must support quick, calm evacuation when corridors are crowded, visibility is poor, or children are frightened. A suitable design should open easily in the direction of escape, remain unobstructed, and include clear, durable exit signage. It should also work with the school’s existing alarm, access-control, and fire-safety systems. Small details matter. A heavy door, confusing latch, or narrow threshold can slow movement during a real emergency.

So, What to look for when buying an emergency exit door for a school? Begin with tested performance, robust construction, safe panic hardware, and dependable weather resistance. The frame must fit the wall correctly. The closer should control the door without making it difficult for smaller students to open. Fire-rated assemblies may be necessary in particular locations, but the correct rating depends on the building design and local requirements. A qualified fire-door inspector should verify the complete assembly, not just the leaf.

Fire protection engineer Glenn P. Corbett, PE, is often associated with a practical egress principle: “A means of egress is a system, not just a door.” That idea deserves attention. A high-quality door cannot compensate for blocked corridors, poor drills, or missing maintenance. Schools should inspect hinges, panic bars, seals, signage, and closing action regularly. Real-world experience may reveal weaknesses that a product brochure hides. The safest choice is therefore a complete, documented solution, reviewed by competent professionals and tested in the school’s actual daily environment.
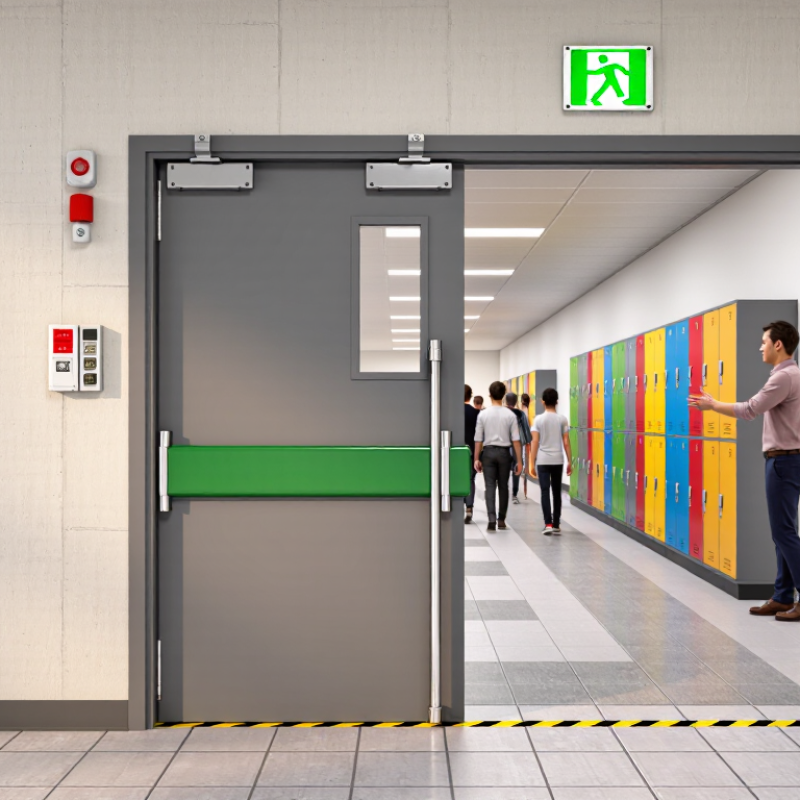
How to Choose an Emergency Exit Door for a School?

Understanding School Emergency Exit Door Requirements

How to Choose an Emergency Exit Door for a School?

Understanding School Emergency Exit Door Requirements

Choosing a school emergency exit door begins with local building and fire requirements. These rules may differ by jurisdiction, occupancy level, and school layout. Confirm the required exit count, clear opening width, fire rating, and door swing with a qualified building professional. Doors usually need to open in the direction of evacuation, especially in crowded areas. A narrow doorway can create dangerous delays during a drill. Panic-release hardware should allow quick opening without keys, special knowledge, or complicated steps. The hardware must also resist unauthorized entry from outside.

The surrounding details matter too. Exit signs should remain visible above the doorway, even when corridors fill with students. Emergency lighting should illuminate the threshold, hinges, and travel path. The door should not be blocked by storage, furniture, or snow. Check accessibility requirements for students and staff with limited mobility. A robust frame, protected hinges, and suitable fire seals can improve performance, but poor installation may still defeat them. This is where many projects become less certain. A door may meet a product specification yet fail because the corridor is too narrow.

Tips: Measure the opening after installation. Test the door during a realistic evacuation drill. Inspect closers, panic hardware, seals, signs, and lighting on a scheduled basis. Keep inspection records. Ask the local authority having jurisdiction to review unusual layouts. Do not assume an older door remains compliant. Schools change, and yesterday’s safe arrangement may need another look.

How to Choose an Emergency Exit Door for a School? - Understanding School Emergency Exit Door Requirements

Selection Dimension Recommended Requirement or Data Why It Matters in a School Verification Point
Door function Use a door that opens in the direction of egress where required by the adopted building or fire code, particularly for higher occupant loads or high-hazard areas. People can exit more quickly during fire, smoke, lockdown-release, or other emergencies. Confirm the required swing direction with the authority having jurisdiction (AHJ) and the approved egress plan.
Clear opening width Provide at least 32 inches (813 mm) of clear opening width for an accessible route. A nominal 36-inch single door commonly provides approximately 32 inches of clear width, depending on hinges and hardware. Supports wheelchair passage, evacuation assistance, and movement of large groups. Measure the clear opening with the door open 90 degrees; do not measure the nominal door leaf alone.
Door height Provide at least 80 inches (2032 mm) of clear door height on an accessible route, unless a specific code exception applies. Reduces head-strike risks and accommodates people carrying equipment or assisting students. Check the finished opening, frame, closer, and threshold together.
Threshold Keep the threshold no higher than 1/2 inch (13 mm) on accessible routes; beveled thresholds should generally have a slope no steeper than 1:2. Limits tripping hazards and makes passage easier for wheelchairs, walkers, and evacuation devices. Inspect the transition between both floor surfaces, especially at exterior doors.
Exit hardware Use hardware that can be operated from the egress side without a key, special knowledge, or excessive force. Panic or fire-exit hardware may be required by the adopted code for certain educational spaces and occupant loads. Students and visitors must be able to leave without training or searching for keys. Check occupant load, occupancy classification, door location, and local panic-hardware provisions.
Opening force For interior, non-fire-rated doors on accessible routes, the opening force is generally limited to 5 lbf (22.2 N), excluding the force needed to release a latch. Fire doors and exterior doors may be subject to different limits. Makes the exit usable by children, people with disabilities, and staff carrying emergency supplies. Test the installed door under normal operating conditions; verify fire-door requirements separately.
Fire and smoke protection Where a protected opening is required, use a listed and labeled fire-door assembly with the rating specified for the surrounding wall or exit enclosure. The required rating is not universal. Helps limit the spread of fire and smoke along evacuation routes. Confirm the wall rating, door label, frame label, glazing, closer, latch, and inspection requirements as one assembly.
Door visibility Use vision panels or adjacent glazing where permitted, with safety glazing and fire-rated glazing where required. Avoid creating a collision hazard. Allows staff to check both sides before opening and improves supervision during evacuation. Check impact-safety glazing, sightline height, privacy needs, and fire-rating compatibility.
Approach and maneuvering space Maintain code-compliant maneuvering clearance on both sides of an accessible exit door; the exact dimensions depend on approach direction, latch location, and door swing. Provides space for wheelchair users, mobility devices, and people assisting children. Measure the finished corridor, landing, handrails, walls, and nearby furniture—not only the doorway.
Exit signage and lighting Provide visible exit signs and emergency illumination where required, with the sign location coordinated with the actual approved exit route. Helps occupants identify the correct exit during smoke, power loss, or low visibility. Verify visibility from classrooms, corridors, assembly areas, and changes in direction.
Security integration Any access-control device must release as required by fire alarm, power failure, and egress rules. Security controls must not prevent free egress. Balances everyday school security with immediate emergency evacuation. Test normal power, backup power, fire alarm activation, manual release, and door re-latching.
Durability and maintenance Select a commercial-grade door, frame, hinges, closer, latch, and exit device suitable for frequent daily cycles and abuse-prone locations. Reliable operation reduces the risk of blocked, damaged, or difficult-to-open exits. Include scheduled inspections, hardware adjustment, signage checks, and documented functional tests.

Note: Requirements vary by jurisdiction, building code edition, fire code, accessibility standard, occupancy classification, occupant load, and school authority. The final door specification should be reviewed and approved by the AHJ and the project design professional.

Assessing Door Location, Size, and Accessibility

Choosing an emergency exit door begins with its location. It should lead directly to a safe exterior area, remain visible from occupied rooms, and avoid storage zones or narrow corridors. NFPA’s report, Structure Fires in Educational Properties (2017–2021), recorded an estimated 3,379 school-property structure fires annually in the United States. That figure makes clear exits more than a design detail.

Exit doors must match the building’s occupant load and evacuation plan. NFPA 101, Life Safety Code, generally requires exit doors to swing in the direction of egress when larger occupant loads apply. Doors should also remain unlocked during occupancy and open without complicated steps. A clear sightline matters. Smoke, backpacks, and temporary displays can quickly hide a poorly placed exit.

Size and accessibility require closer checking. The 2010 ADA Standards specify at least 32 inches of clear opening for an accessible doorway, measured with the door open 90 degrees. Hardware should be operable with one hand and without tight grasping or twisting. Thresholds must not create a dangerous bump for wheelchairs or mobility devices. The U.S. Access Board also emphasizes maneuvering clearance beside doors, not just width. A wider door can still fail in practice.

From site inspections, I would test the door with a full backpack and a crowded hallway. That sounds simple. It is easy to overlook. Drawings may pass review, yet children may hesitate when the route feels unfamiliar. School staff should verify visibility, lighting, swing direction, hardware, and unobstructed exterior discharge with the local authority having jurisdiction.

Choosing Suitable Materials, Hardware, and Fire Ratings

An emergency exit door for a school must balance fire protection, daily durability, and fast evacuation. Steel doors usually provide strong resistance to impact, heat, and heavy use. Solid timber doors can also perform well when tested as complete fire-door assemblies. The material alone is not enough. Frame, glazing, seals, hinges, and installation must match the approved design.

Choose a certified fire rating based on the building’s risk assessment and local authority requirements. Ratings may differ for corridors, classrooms, kitchens, and stairwells. A fire-rated vision panel can improve supervision, but it must carry the same tested rating as the door. Intumescent strips and smoke seals should sit correctly around the edges. Small gaps can undermine an otherwise expensive assembly. Check the test report, certification records, and installer’s competence rather than trusting appearance.

Hardware needs equal attention. Panic exit devices should open the door with one clear push, even when children are moving quickly. Use robust hinges, an effective door closer, and handles that do not trap clothing or fingers. The door must not be locked, blocked, or difficult to open during occupied hours. Field inspections often find mats, bins, or uneven thresholds reducing clear width. That detail is easy to miss. I would also review the choice after observing real traffic for a week; a technically correct door may still need adjustment if students struggle with its weight or closing speed.

Evaluating Security, Visibility, and Ease of Operation

How to Choose an Emergency Exit Door for a School?

An emergency exit door must protect students without slowing evacuation. Security begins with strong construction, dependable hinges, and controlled access from outside. However, excessive locking can create dangerous delays. Choose hardware that permits immediate exit without keys, codes, or special knowledge. Local fire and accessibility requirements should guide every specification.

Visibility matters during crowded movement. A narrow vision panel can help staff check the corridor before opening the door. Safety glass, clear sightlines, and bright lighting reduce confusion near the exit. Avoid large blind areas beside the frame. Staff should also see whether someone is waiting outside. Cameras may support supervision, but they cannot replace direct visibility or trained personnel.

Operation should feel natural under pressure. During school walkthroughs, I have seen adults hesitate when a handle was unfamiliar. That small pause matters. Test the door with different users, including children, visitors, and staff carrying equipment. It should open with one smooth movement and require modest force. Check it after repeated drills, not only after installation. A door may perform well on paper yet feel awkward in practice. That is worth questioning. Inspect closers, panic hardware, seals, and floor clearance regularly. Keep the surrounding area free from bags, furniture, and stored materials. Evaluate security, visibility, and operation together, because improving one feature can quietly weaken another.

Planning Installation, Inspection, and Ongoing Maintenance

Choosing an emergency exit door for a school starts with the evacuation plan, not the product catalogue. Map classrooms, corridors, stairwells, and outdoor assembly areas. The door should support a clear escape path during noise, smoke, and power loss. Select durable, fire-rated assemblies where the building design requires them. Confirm requirements with the local authority and a qualified fire-safety professional. Details vary by location. They matter.

Plan installation around student movement and daily supervision. Keep the approach free from lockers, bins, display boards, and stored sports equipment. The door should open easily in the escape direction without a key, special knowledge, or excessive force, where applicable rules require this. Coordinate the frame, hinges, vision panel, closer, alarm interface, and threshold before ordering. A site measurement is worth repeating. Small errors can create dangerous gaps or binding. Test the complete assembly after installation, not only the hardware.

Inspection should follow a written schedule, with extra checks after drills, impact, or building work. Staff can look for blocked routes, loose fasteners, damaged seals, failed alarms, and doors that do not close correctly. Trained personnel should assess fire-resistance and release functions. Record the date, defect, risk, repair, and verifier. Do not silence a fault and forget it. Maintenance includes cleaning contact surfaces, lubricating approved components, adjusting closers, and replacing damaged parts with compatible items. A realistic review may reveal that a rarely used exit receives little attention. That assumption deserves challenge.

FAQS

Where should a school emergency exit door be located?

It should lead directly to a safe exterior area. Keep it visible from occupied rooms and away from storage zones. Avoid narrow corridors, hidden corners, and blocked outdoor areas. A clear route matters.

How wide should an accessible emergency exit doorway be?

Provide at least 32 inches of clear opening when the door is open 90 degrees. Check maneuvering space beside the doorway, not only its width. A wide door can still be difficult to use. That is easy to miss.

Which direction should an emergency exit door swing?

The door should swing toward the escape route when required by occupant load and local rules. Confirm the direction with the local authority. A crowded hallway changes everything.

Should an emergency exit door remain unlocked during occupancy?

It should allow immediate exit without keys, codes, or special knowledge, where rules require this. Excessive security can create dangerous delays. Security must not defeat evacuation.

What hardware makes an emergency exit door easy to operate?

Choose hardware operable with one hand and without tight grasping or twisting. Test it with children, visitors, and staff carrying equipment. It should open in one smooth movement. My judgment could be wrong without real testing.

How can schools improve exit visibility?

Use clear sightlines, suitable lighting, and a properly placed vision panel. Remove backpacks, display boards, bins, and furniture near the door. Staff should see the corridor and exterior area. Cameras cannot replace direct visibility.

What should schools check before installing an emergency exit door?

Map classrooms, corridors, stairs, and outdoor assembly areas first. Coordinate the frame, hinges, closer, alarm connection, vision panel, and threshold. Repeat site measurements before ordering. Small errors can cause binding or unsafe gaps.

How often should emergency exit doors be inspected?

Follow a written inspection schedule and check again after drills, impacts, or building work. Look for blocked routes, loose fasteners, damaged seals, and failed alarms. Record defects, repairs, dates, and responsible verifiers. Do not silence a fault and forget it.

How should accessibility and emergency performance be tested?

Test the complete assembly with a full backpack and a crowded hallway. Check force, clearance, swing direction, lighting, and exterior discharge. Repeat testing after installation and regular drills. Paper compliance is not enough.

Conclusion

Choosing an emergency exit door for a school requires balancing safety, accessibility, durability, and daily usability. Start by understanding the school’s emergency exit requirements and identify locations that provide a clear, direct route away from classrooms and other occupied areas. The door should have suitable dimensions, allow smooth passage for all users, and remain accessible without creating obstacles or confusion during an emergency. Consider strong, durable materials, reliable hardware, and an appropriate fire rating based on the building’s safety plan.

What to look for when buying an emergency exit door for a school? Look for a design that is easy to recognize, highly visible, simple to operate, and secure without preventing rapid evacuation. It should support effective supervision while maintaining necessary protection against unauthorized access. Proper installation is equally important, including alignment, exit signage, opening direction, and hardware testing. Regular inspections, cleaning, repairs, and maintenance should be scheduled to ensure the door remains functional and dependable throughout its service life.

Aria

Aria

Aria is a dedicated marketing professional with a deep passion for innovative strategies and a keen understanding of our company's product offerings. With a wealth of experience in the industry, Aria excels at crafting engaging content that highlights the unique features and benefits of our......